
You can create or update users by uploading a CSV file. The service will process the records automatically, or will flag any issues with the file for you to address.
To onboard users via CSV file:
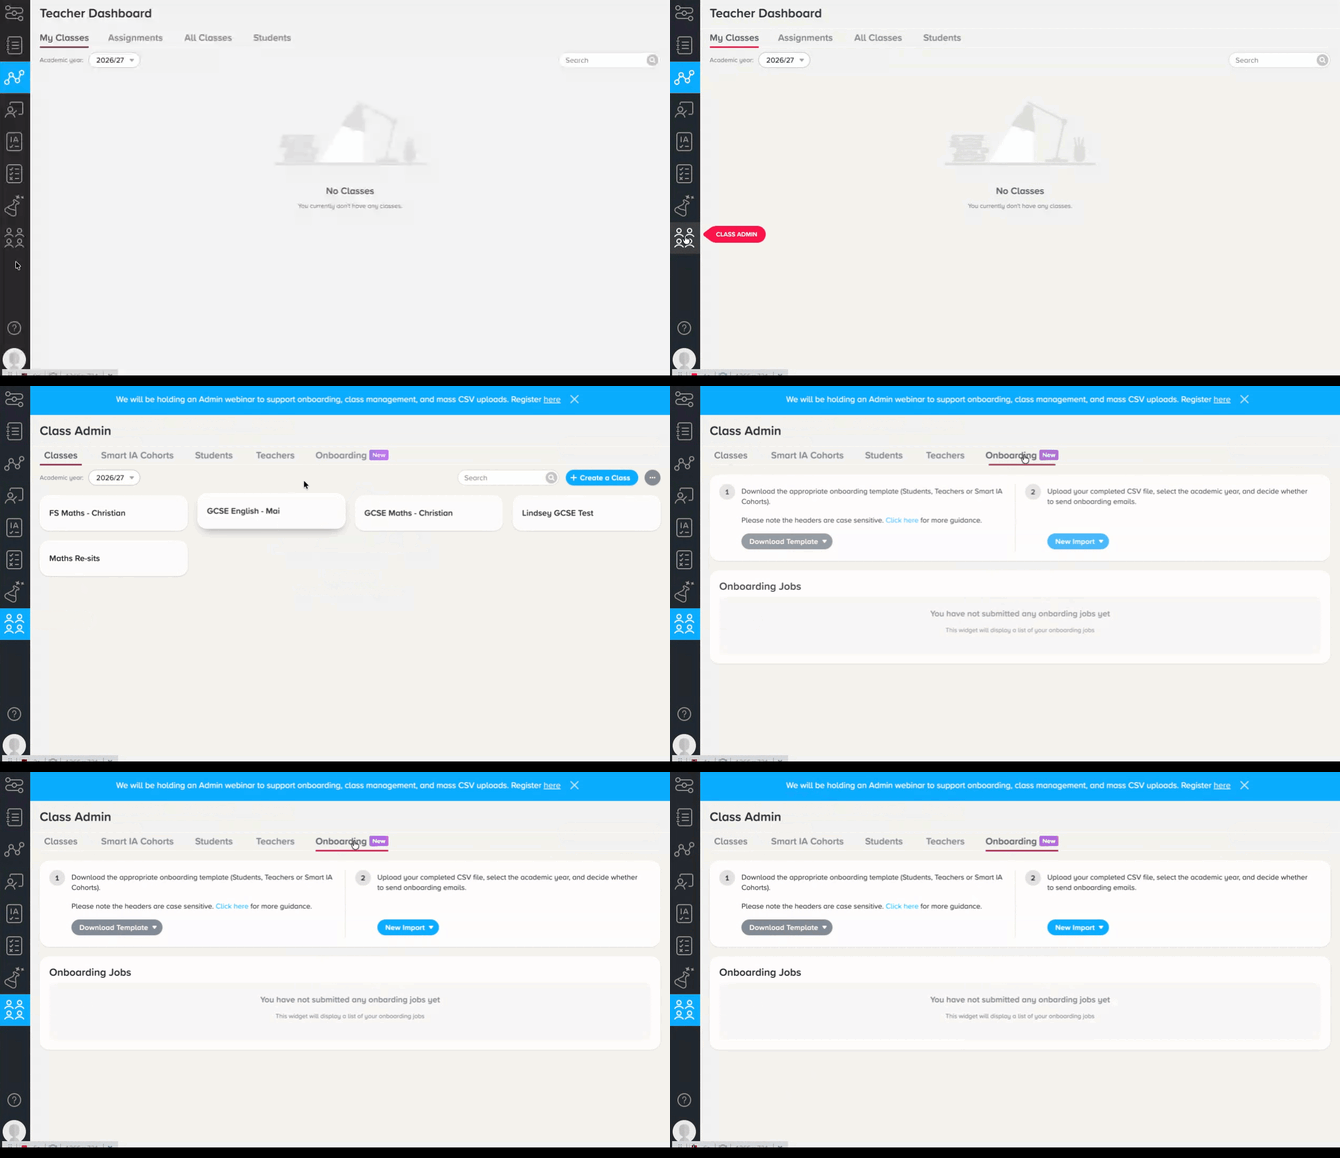
3. Click ‘Download template’, then select either ‘Students Template’, ‘Teachers Template’ or 'Smart IA Cohorts Template'. A CSV template will download to your computer for you to update.
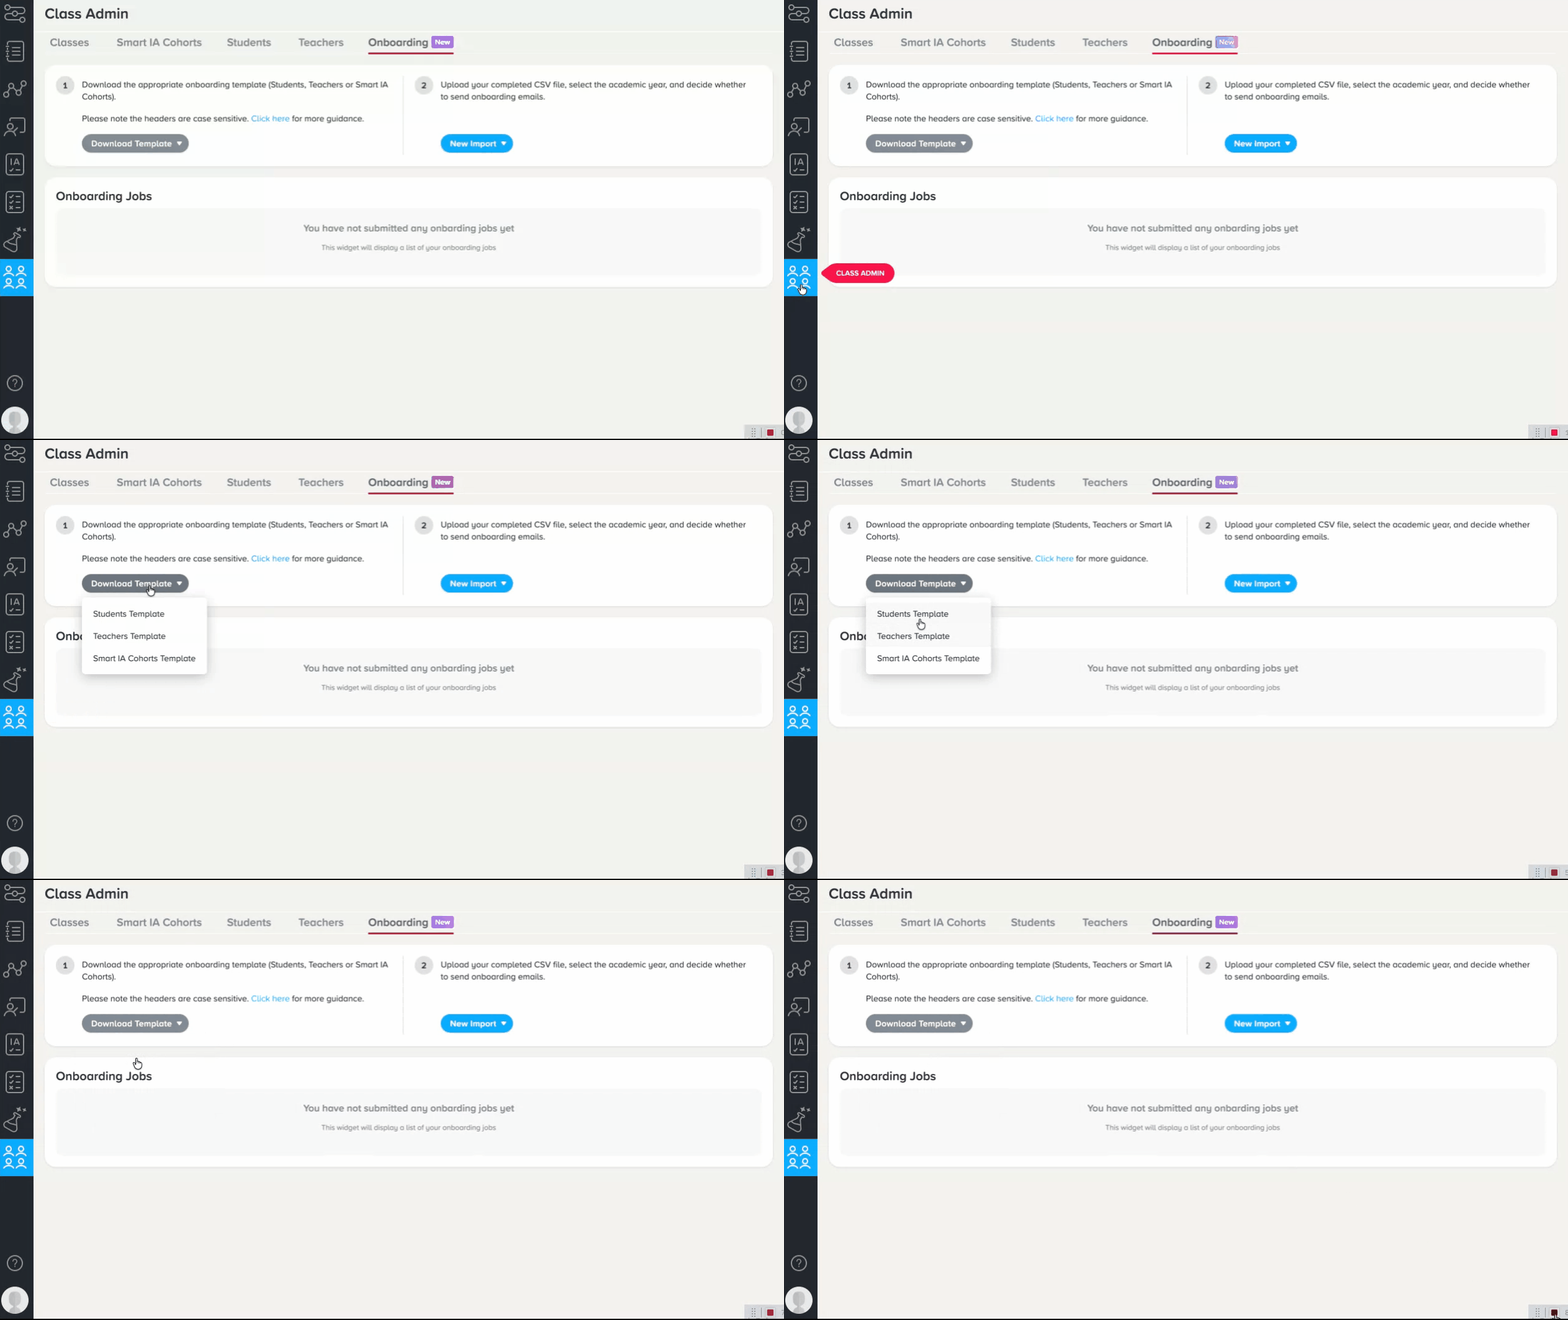
Important notes
- Please ensure that there is one row per student, with all of their classes separated by semi-colons ( ; )
-
CSV onboarding will overwrite any classes that a student or teacher has been assigned to in a previous CSV upload. As such, you will need to ensure that you include all the new and existing classes that they are assigned to in order to avoid removing them from any classes.
- If you are changing email domains of existing users or users' UPNs/ IDs please consult our more detailed guidance, or contact a member of our team.
- For more detailed information on uploading users, please see here.
How usernames are decided
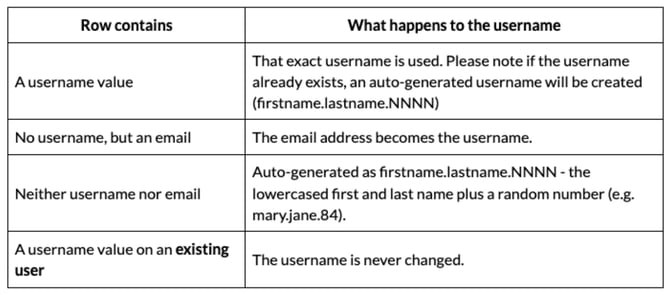
The Username column is optional. Please see below for how they are formulated:
How passwords are decided
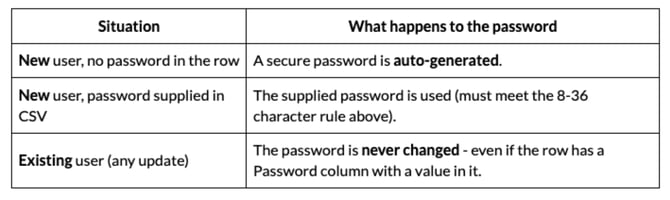
The Password column is also optional, and behaves differently for new versus existing users. Please note you can also manage passwords via Class Admin.
Click here for more information on "What data can I upload?" and "How to format your CSV file".
4. Once the template is complete, upload your completed CSV file, select the academic year, and decide whether to send onboarding emails.
To upload the file by clicking ‘New Import’ > ‘Import Students ’, ‘Import Teachers’ or 'Import Smart IA'.
.gif?width=670&height=378&name=CPT2608271614-1264x712%20(1).gif)
For more detailed information on uploading users, please see here.